This tutorial will explain how to create your own CCTV IP Webcam using a Raspberry Pi Zero Wireless £9 computer!
It uses the excellent RPi Web Cam Interface open source software, which offers a near real-time live video stream via a web interface for the Raspberry Pi camera module, as well as motion detection video recording.
It can be used for a wide variety of applications including surveillance, dvr recording and time lapse photography. It is highly configurable and can be extended with the use of macro scripts. It can be opened on any browser (smartphones included) and contains the following features:
- View, stop and restart a live-preview with low latency and high framerate. Full sensor area available.
- Control camera settings like brightness, contrast, … live
- Record full-hd videos and save them on the sd-card packed into mp4 container while the live-preview continues
- Do timed or continuous video recording with splitting into fixed length segments
- Take single or multiple (timelapse) full-res pictures and save them on the sd-card (live-preview holds on for a short moment)
- Preview, download and delete the saved videos and pictures, zip-download for multiple files
- Trigger captures by motion detection using internal or external detection processes.
- Trigger captures by many scheduling-possibilities
- Circular buffer to capture actions leading up to motion detection
- Control Pan-Tilt or Pi-Light
- Shutdown/Reboot your Pi from the web interface
- Show annotations (eg timestamp) on live-preview and taken images/videos
- Supports selection from 2 cameras when used with a compute module
The software is fully functional with a Pi Zero Wireless, offering a small footprint that operates over wifi and only requires a power source.
The example here uses a 160 degree fisheye camera module that gives a much better field of view than the standard official camera (and is fully compatible). If you don’t need a better viewing angle, the official Pi Zero case fully integrates the official camera into a very neat little package!
You can also buy a 160 degree fisheye IR (infrared) camera that comes with IR LED lights which are powered and attached to the camera board. There are also many more camera options at Modmypi, such as a 222 degree fisheye, and an IR on/off camera.
SHOPPING LIST
- £9.60 – Raspberry Pi Zero W – https://www.modmypi.com/raspberry-pi/raspberry-pi-zero-board/rpi-zero-board/raspberry-pi-zero-wireless
- £23.99 – 160 degree fisheye camera – https://www.modmypi.com/raspberry-pi/camera/camera-boards/raspberry-pi-camera-board-fisheye-160°-lens-5mp/?limit=75
- £7.50 – Official power supply – https://www.modmypi.com/raspberry-pi/accessories/power-supplies/raspberry-pi-official-universal-power-supply-5.1v-2.5a-white
- £8.96 – 16GB Sandisk SD card – https://www.amazon.co.uk/gp/product/B012VKWY7I
Update: I strongly advise against using SanDisk Ultra SD cards as I’ve had many fail on me over time. Instead, use SD cards designed for video surveillance such as the SanDisk High Endurance Video Monitoring Card – the 32GB model can be had for £16.99 – https://www.amazon.co.uk/gp/product/B00V5Q1K3O - £3.50 – 150mm ribbon cable for the camera – https://www.modmypi.com/raspberry-pi/camera/camera-cables/raspberry-pi-zero-camera-cable-150mm/?limit=75
- £5.99 – Official Pi Zero case – https://www.modmypi.com/raspberry-pi/raspberry-pi-zero-board/rpi-zero-cases/official-raspberry-pi-zero-red-and-white-case
Total: £59.54
INSTALLING THE SOFTWARE
Write an Image onto the SD Card
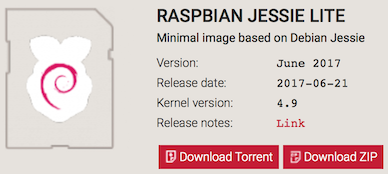
We will be using the lite version of Raspberry Pi’s official operating system as the base for our security camera.
- Download RASPBIAN JESSIE LITE from
https://www.raspberrypi.org/downloads/raspbian/
- Download Etcher which we will use to burn the image to an SD card (this supports Windows, OSX, and Linux, and is really easy to use):
https://etcher.io
- Insert your microSDXC card into your computer
- Run Etcher and press the Select Image button
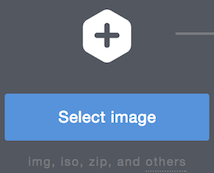
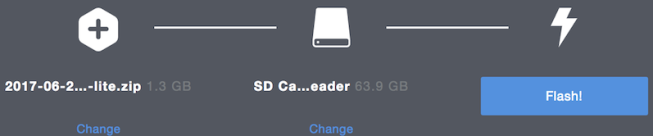
- Find your previously saved 2017-06-21-raspbian-jessie-lite.zip file from step 1 (or whichever version is the latest)

- Your SD card may already be automatically detected, but if not press the Change link to select the card.
- Press the Flash button
- Once finished, Etcher will automatically unmount the SD card. However, remove and plug the card back in so that we can copy some files to the SD card.
- Given that the Pi Zero W has limited ports, performing an initial configuration such as connecting to wifi or enabling SSH would require a keyboard and monitor. This can be avoided by putting two text files in the top-level directory of the SD card, one to enable SSH and the other to set up wifi by including details within the text file.
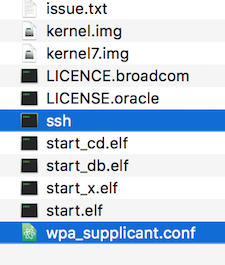
- The inserted SD card should be labelled boot and contain files called bootcode.bin, config.txt, etc.
- Create a new text file in the same location as the previously mentioned files called “ssh”. Note that it’s not called ssh.txt, and obviously don’t include the quotes (“”). This text file can be empty as it’s just the file name which enables ssh.
- Create another new text file called “wpa_supplicant.conf”. This file does need some information contained within, so open the file with a text editor such as notepad. Paste in the following lines of text and update the ssid and psk lines with your local wifi details.
ctrl_interface=DIR=/var/run/wpa_supplicant GROUP=netdev update_config=1 country=GB network={ ssid="enter_your_wifi_name_here" psk="enter_your_wifi_password_here" key_mgmt=WPA-PSK } - Your SD card should now have the above two mentioned files as seen below. Once you’ve finished, properly eject the SD card from your computer.
- Put your SD card into the Pi Zero and then assemble the ribbon cable, case, and camera. Don’t power the Pi on just yet though…
Determine the IP address
- When the Pi powers up, it will obtain an IP address automatically from your router. You will want to know what this IP is, but unless you plug in your Pi to a monitor (which is an option via the HDMI port), you need to determine the IP another way. This is where a very useful local network scanning utility called Fing comes in. Fing is an iOS or Android app that will show you all devices on your network and their IP address.
- Download Fing from the Appstore (or find more details from their website https://www.fing.io/)
- Run Fing and let it scan your network. If you already have any Raspberry Pi devices, make a note of their IP so you can discount them when you turn the Pi on.
- Turn on your Raspberry Pi Zero and give it 3 or so mins to boot.
- Scan your network using Fing again, and all being well you should hopefully see a new Raspberry Pi entry with it’s IP address! The hostname will be called “raspberrypi”
- If a new IP doesn’t appear, double check your wifi settings by inserting the SD card back into your computer and looking at or editing wpa_supplicant.conf. If that method still doesn’t work, plug the Pi into your monitor or TV via the HDMI port (you may need a mini to normal HDMI converter).
- If you’re using Windows, you will need a way to SSH to your Pi for remote access to install the software. Download Putty (putty-64bit-0.69-installer.msi) from https://www.chiark.greenend.org.uk/~sgtatham/putty/latest.html and install. If you’re using macOS, just open Terminal (press cmd+space and type in Terminal to find it).
- For Putty instructions, please follow this guide:
https://www.raspberrypi.org/documentation/remote-access/ssh/windows.md
- For macOS, at the terminal simply type (replacing 192.168.0.2 with your Pi’s IP address).
ssh pi@192.168.0.2
- The default password is raspberry
- For Putty instructions, please follow this guide:
- You should now be at your Pi’s command prompt:
pi@raspberrypi:~ $
Update the Pi and Enable the Camera
- Let’s update the software by running the following lines one at a time:
sudo apt-get update
sudo apt-get upgrade
- Let’s change the password:
passwd
- It’s a good idea to give the Pi a static IP address. This excellent tutorial covers how to do this:
http://raspberrypituts.com/raspberry-pi-static-ip-address-simple-tutorial/
- We now need to enable the camera and set the timezone. This can be done by running:
sudo raspi-config
- Select Interfacing Options from the menu
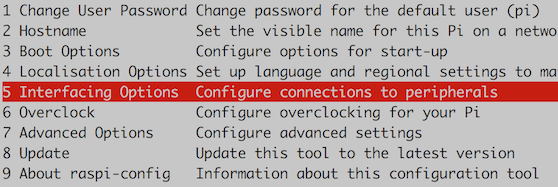
- Select Camera and then Yes and then Ok
- Back at the main menu, select Localisation Options and then Change Timezone
- As an example for the UK, select the following:
Europe -> London
- Select Interfacing Options from the menu
- Now close the window by selecting Finish, and press Yes to reboot
- SSH back into the Pi using Putty or terminal.
Install RPi Web Cam Interface
- If you aren’t there already, cd into your home directory
cd ~
- Install git (because this isn’t included with Jessie Lite by default)
sudo apt-get install git vim
- Run the following (either a line at a time or all at once is ok)
git clone https://github.com/silvanmelchior/RPi_Cam_Web_Interface.git
cd RPi_Cam_Web_Interface
chmod u+x *.sh
./install.sh
- You should now be presented with the Configuration Options screen. To navigate this page, pressing tab will jump between the options window and the Ok/Cancel buttons. When in the options window, use the arrow keys to move up and down.

Cam subfolder – best leave this at the default html. You would only need to change this if you were hosting multiple sites on the same Pi
Autostart – Leave it at Yes so that the software starts automatically after a reboot
Server – Leave this at Apache. There are other options, but for ease of use Apache is the best choice.
Webport – If you are thinking of accessing the camera from outside your home, it is best this port is changed to something between 1024 and 65535. Make a note of the number if it’s something other than 80.
User – Set a username. You could leave this empty if you’re only ever going to access the camera from within your network, but it’s advised to set a user and pass for extra security.
Password – Set a password
jpglink – Leave this set to no, it’s for backwards compatibility - Press Ok when you have set your desired options
- Press Yes to Start Now.
Accessing the Web Interface
- All being well, you should now be able to enter your Pi’s IP address into a web browser. e.g
http://192.168.1.5/html/
If you used a different port, enter this as follows:
http://192.168.1.5:2244/html/
- Hopefully you can now see a live stream from your camera
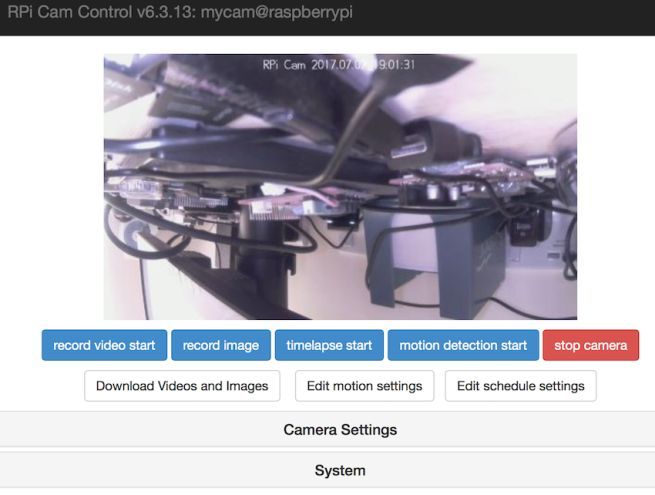
- Let’s change a few key options at this point. Notice how the camera is upside down? This can be rotated in 90 degree intervals from the “Rotation, default 0:” option within Camera Settings. In this case we will choose Rotate_180:

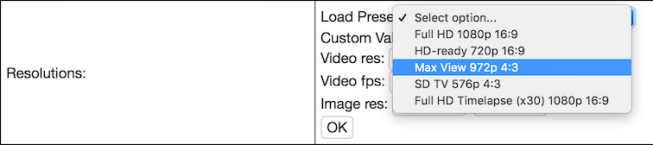
- The default resolution is 1080p, but you loose a lot of the sensor with this, so within Camera Settings -> Resolution, from the Load Preset drop-down menu, choose Max View 972p 4:3
- If the annotation text along the top of the video feed (showing date/time) blends too much into a white background, change Camera Settings -> Annotation -> Background (drop-down menu) to On.

Enabling Motion Detection
- Change Motion Detect Mode (within Camera Settings) to Internal

- Adjust the parameters such as Noise Level, Threshold, etc within motion Settings. Full details on what these do can be found here:
http://elinux.org/RPi-Cam-Web-Interface#Motion_Detection
That is it! Feel free to explore the Wiki http://elinux.org/RPi-Cam-Web-Interface, and if you have any questions there’s an active support forum here: https://www.raspberrypi.org/forums/viewtopic.php?f=43&t=63276
Advanced Guides
If you would like to see what else is possible with these cameras, please have a look at some of my other guides:
- Send notifications to your phone when motion is detected:
https://quavoce.wordpress.com/2017/09/29/telegram-send-messages-photos-animated-gifs-from-your-raspberry-pi-and-rpi-web-cam/ - Turn on/off notifications from your phone using IFTTT DO buttons:
https://quavoce.wordpress.com/2017/01/17/rpi-cam-web-interface-turn-on-and-off-motion-detection-using-ifttt-do-buttons/ - Access your cameras remotely in a more secure way using a reverse proxy:
https://quavoce.wordpress.com/2017/06/04/full-reverse-proxy-instructions-with-dynamic-ip-and-https-encryption/

You must be logged in to post a comment.